From the first day someone accidentally photocopied her hand while trying to copy a document it became inevitable that people would start using copiers and other equipment intended for flat surfaces to reproduce various body parts and other 3-dimensional objects. The web is flooded with such images that harken back to a 5 year-old's antics. Happily, along with the random body part images are some serious artistic efforts that make use of technology unavailable even just a few years ago. These are exciting times.
Scanners offer much more sophistication than photo-copiers, but the idea is the same... a flat surface gets digitized. As photographers know well, generally that flat surface is a slide or negative. Film photographers moving from analog to the digital world willingly or reluctantly scan their images to be able to manipulate and reproduce.
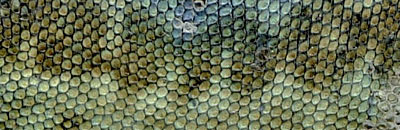
My background is fine art, not photography so I approach the medium a bit differently than photographers who explore scanner photography, but even with a fairly free-wheeling artsy approach, some technical stuff is useful. I use an Epson 4990 with a native resolution of 4800 pixels per inch. Scanners typically have much higher resolution than cameras because they are expressly made for enlarging small slides or film. This happenstance allows them to be used to capture images directly with great clarity that can then be enlarged to sizes much bigger than traditional photographs without loss of detail.
It is thrilling to have such amazing resolution available, but sadly it comes also with an extremely shallow depth of field. The fixed focal point is aimed just above the glass and the light beam which illuminates the image does not penetrate much beyond the glass. So along with diminished focus, there is a drop-off of light almost immediately above the glass. It is the tension among these extremes that makes scanner photography challenging, and of course that is half the fun. Like so many other digital processes, entry is easy, but mastery remains only for the dedicated. Success on the very first scan hopefully encourages one to stick around and discover what a moving light source might reveal. With the transparency lid, light can even penetrate translucent objects - really too cool for words (and not addressed in this introductory discussion).
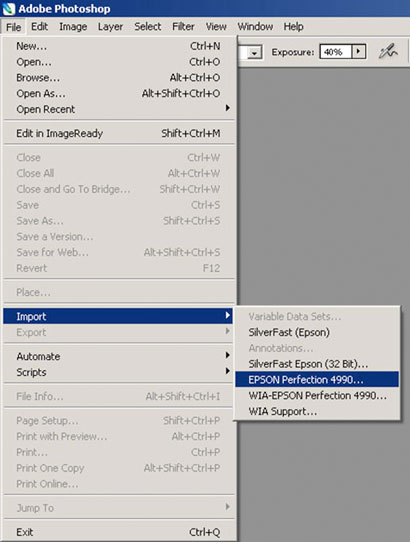
Though scanners generally come with software that helps with the scanning process, I prefer to use the Epson interface with Photoshop directly using the “import” command.This saves me steps later, since my image is created directly as a .psd rather than a .tiff or .jpg.
I recommend that you avoid saving your images as .jpgs. Each time an image is changed and then saved as a .jpg it is compressed. Compressing means pixels are tossed. Repeated compression destroys image quality – fast and forever.
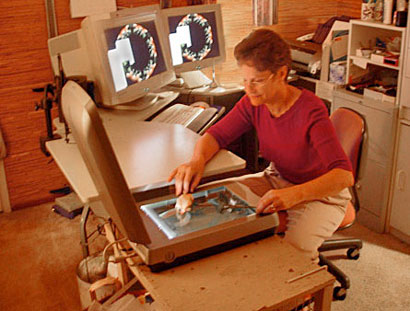
When scanning 3-D objects, open or remove the lid of the scanner, depending on your scanner and/or preferences, either way is fine.
Open whichever scanning software you are using and select “import” from pull down menu, select your scanner from the list. (All of my descriptions derive from Epson/Photoshop--other scanning/editing software will vary somewhat, but generally have same functions).
Once you have selected your scanner from the import screen,
adjust scanning options.
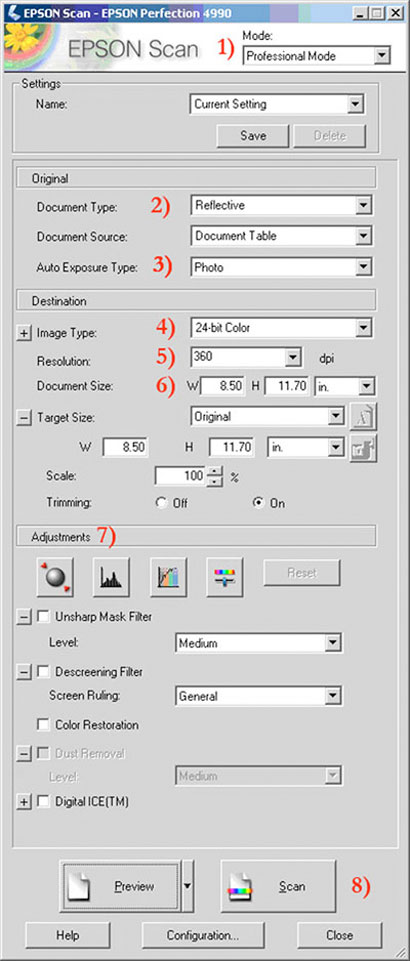
1) Mode
a. Mode defines the amount of control you wish from entirely "automatic" to "professional" which gives you the greatest flexibility, but requires some knowledge to use effectively.
b. You may explore automatic on your own, my discussion assumes "professional" is selected.
2) Document Type:
a. "Reflective" is typically the setting used for scanner photography, it just means that the light will hit the object and reflect from it to create the image.
b. "Film"- there are several film settings designed for slides or film (worth trying but not addressed here)
3) Exposure Type:
(changes depend on what you selected above)
a. Assume that "Reflective" was selected above, then select Exposure Type: "Photo" for greatest tone range.
4) Image Type
a. "24-bit Color" is best to start with; if you have "48-bit Color" you may wish to explore, but it will make files much larger, so not best for beginning.
b. Select "Gray Scale" for black and white final product. No color information will be captured, so only use this if you are certain.
5) Resolution:
a. This is the big one. The higher the resolution (pixels per inch) the bigger the final image can be without loss of clarity.
b. Two cautions:
i. File sizes grow dramatically with high resolution settings, so unless you have a monster machine, don't get greedy.
1. Remember that the smaller the object being scanned the higher the resolution can be before file gets unmanageable.
2. Conversely, if you are scanning anything approaching letter size, you'll not be able to crank up the resolution far without exceeding 500 MB or even a GIG and more. Most computers have difficulty with files that big.
ii. The other caution is that any setting beyond the native resolution of your scanner is wasted effort because the scanner can't capture more information than that. In my case, the Epson 4990 can scan up to 4800 ppi. It has settings offering 9600 ppi and more. The software will simply make up the data through interpolation to get to that resolution. No additional clarity is gained and likely an unmanageable file will be!
6) Document Size:
a. I recommend for the sake of simplicity that you start with the setting that says "original". It will help in understanding other technical issues and you can always specify the final size of the document later.
b. For the same reason, I'd leave scale at "100%" - you can change it in your photo editor if desired. Keep it simple at this point.
7) If you have Adjustments available to you:
a. Leave all the boxes unchecked. Do not use filters, descreening, color restoration or Digital Ice. You are basically trying to shoot "raw." Leave manipulation until later.
b. The exceptions are the buttons which control "Histogram" and "Tone Correction".
i. "Histogram" is the most important reason to use "Professional Mode". This setting is what will allow you to wage war with the depth of field
ii. "Histogram" will NOT make more depth of field, but it will help you light your subject in ways that may help it "look" as though it does.
1. First, scan once without any buttons used. This will be your baseline exposure.
2. Second, scan using the "Auto Exposure" button, this will show you an extreme. Chances are excellent that small areas of the light colors will be over-exposed, washed out with irretrievable loss of detail.
3. Third, scan using the "Histogram" sliders after the "Auto Exposure" to back off slightly. This step is trial and error, no way around it. With practice, balance can be achieved between over exposed highlights and an image that is too dark overall.
iii. An even more subtle adjustment is the "Tone Correction" button which offers an "Open Shadow" option. This will send light deeper into the object, but the loss of contrast is severe, so the "User Defined" option may work out better. Again, there is no way around trial and error until you are comfortable with these settings.
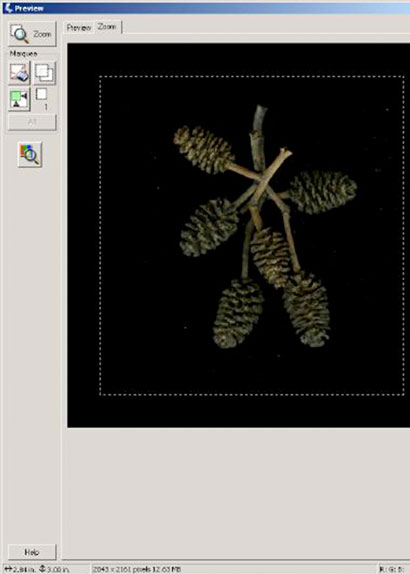
iv. A last comment about these adjustments is that you can "Preview" as you go along, so it is perfectly reasonable to play with the sliders until you like what you see. Try the "Zoom" option if you can, to get an even better preview.
8) Use the Scan button to create your file.
Save file as RGB, this setting has the best color gamut (largest range of colors). Industry standard is Adobe 98 RGB, if you use this setting; it is easy to correlate to other software or color systems, like Pantone. More importantly, your images will look better. sRGB is a format commonly seen, but it has fewer colors so again, colors ultimately less vibrant, like .jpg images mentioned earlier, its best application is for web use not printing. CYMK conversions are necessary if the image is to be printed with traditional offset printing, but its color gamut is extremely limited, so your beautiful rich colors in RGB may look flat. Exercise care and do test prints if taking your images into a CYMK environment.
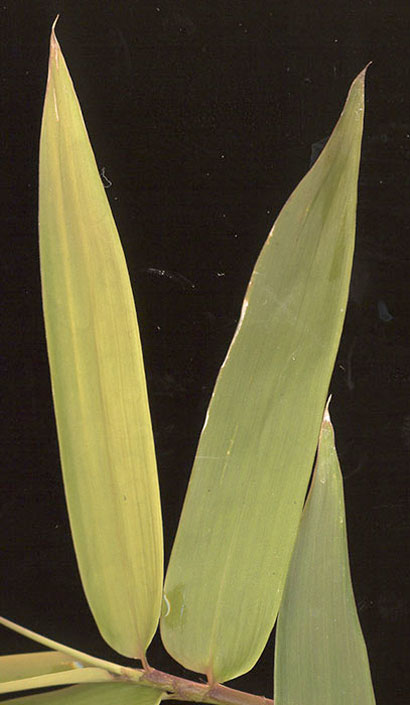
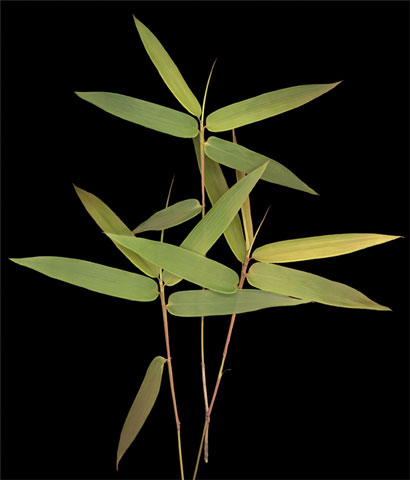
Sometimes, though, plant material is wonderful in other ways, but has been bruised or damaged before making it to the scanner. In a photo editing program much is possible, if “fixing” the flaws is important to you.
Raw scan:
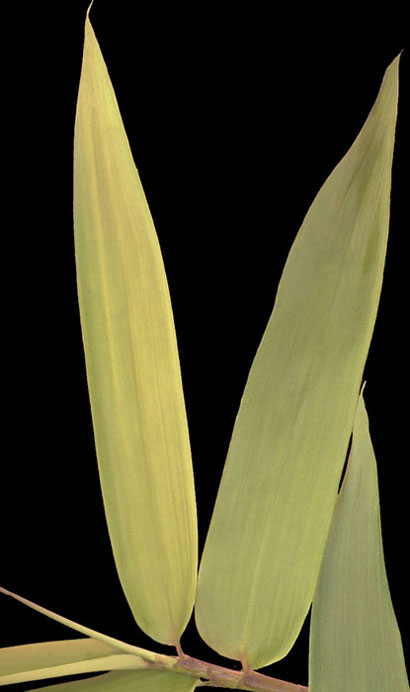
After editing in Photoshop:
Frequent back and forth viewing helps guide the decision making. Below is another partial view:
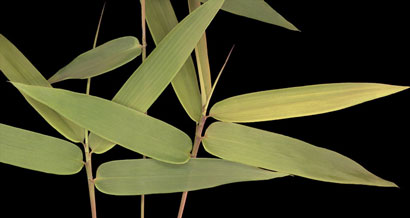
Then the edited image, all cleaned up, is ready to manipulate or use as final image:
See more examples at: http://www.MarshaTudor.com
Images on this page Copyright © Marsha Tudor
Copyright © Morning Earth 2005-2010
|